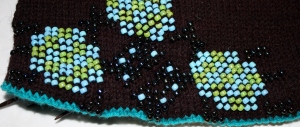
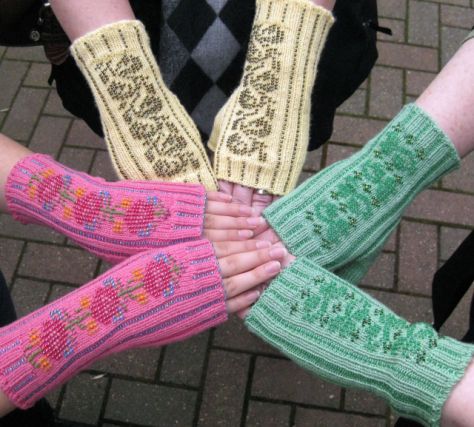
Bead Knit Swatch
Here is a little sampler to learn how to bead knit.

Materials: An assortment of colours in size 8/0 beads: approx 25 m, sock weight, 4-ply yarn; 2, 2.5mm dpn’s, dental floss threader for stringing the beads: 2 markers and the usual notions.
How to use the chart:
1. Read each row from right to left, as in regular charts.
2. When pre-stringing the beads turn the chart upside down, but still read the chart from right to left while stringing the beads.
3. Turn chart right side up to knit from the chart.
4. Each square represents a twisted stitch with the bead colour.
5. The symbol on is each square is to remind the knitter that each stitch is twisted.
Some bead knitting rules:
1. Every stitch with a bead on it must be twisted – this helps to keep the beads from moving off of the arm of the stitch.
2. Work into the back of the stitch to twist it.
3. If there is no bead on the row above a bead that stitch must be twisted as well.
4. Bead knitting works easiest on a knit row – try to avoid purling.
5. First bead strung is last bead knit and last bead strung is first bead knit.
Method for the swatch:
Work with 2 dpn’s or a short circular needle. When working with the beads – after a row is knit, slide your stitches back so that they can be knit again. The yarn will then be dragged loosely across the back of the knitting so that you can start the next row.
Method for pre-stringing the beads:

1. Thread the end of the yarn through the large eye of the dental floss threader.
2. Working from the chart as detailed above, start picking up and stringing the beads.
3. With the tip of the threader pick up each bead and slide onto the yarn.
4. Move the beads down on the yarn as you thread them.
5. Continue in this manner until all the beads are threaded onto the yarn.
Swatch:
When knitting the swatch if you find a bead out-of-order – there is only one fix, cut the yarn and remove, change the bead. If there is an extra bead, sometimes the bead can be removed by crushing the bead with pliers. Be aware, sometimes the yarn will be cut by this method.
Cast on 26 sts.
Knit back and forth for 6 rows to create 3 ridges.
Row 1 – RS – Knit .
Row 2 – WS – K3, purl to last 3 sts, K3.
Repeat rows 1 and 2 – 4 rows knit above garter edge.
Row 5 – K8, pm, work row 1 of chart, pm, K8. Slide stitches back to other end of the needle.
Row 6 – P3, K5, slm, work row 2 of chart, slm, K5, P3. Slide stitches back to other end of the needle.
Row 7 – K8, pm, work row 3 of chart, pm, K8. Slide stitches back to other end of the needle.
Row 8 – P3, K5, slm, work row 4 of chart, slm, K5, P3. Slide stitches back to other end of the needle.
Row 9 – K8, pm, work row 5 of chart, pm, K8. Slide stitches back to other end of the needle.
Row 10 – P3, K5, slm, work row 6 of chart, slm, K5, P3. Slide stitches back to other end of the needle.
Row 11 – K8, pm, work row 7 of chart, pm, K8. Slide stitches back to other end of the needle.
Row 12 – P3, K5, slm, work row 8 of chart, slm, K5, P3. Slide stitches back to other end of the needle.
Row 13 – K8, pm, work row 9 of chart, pm, K8. Slide stitches back to other end of the needle.
Row 14 – P3, K5, slm, work row 10 of chart, slm, K5, P3. Slide stitches back to other end of the needle. Resume knitting back and forth.
Row 15 – K8, remove marker, K10tbl, remove marker, K8.
Row 16 – K3, purl to last 3 sts, K3.
Row 17 – Knit.
Row 18 – K3, purl to last 3 sts, K3.
Finish by knitting 6 rows and binding-off as normal.
Cut drags across the back so that the swatch can lie flat and block. Drags can be left uncut if they are loose enough.


